This blog post serves as a tutorial, aiming to provide an overview of how Docker Compose can be utilized with Python and Postgres to create a robust data ingestion pipeline app. Divided into three parts, this tutorial walks the reader through the fundamental concepts of Docker and Dockerfiles for container orchestration1 and offers hands-on implementation of a containerized data ingestion project through a carefully crafted Docker Compose script. Throughout this tutorial, I place special emphasis on essential concepts, including:
- Volume mounting for enabling persistent storage of data and a secure approach to passing environmental variables;
- Handling of environmental variables and adapting the script to load them from a configuration file;
- Enhancing clarity and maintaining an organized directory structure for a project.
A list of measures is included, which can be implemented further down the road to enhance the reliability, efficiency, and overall management of the data pipeline.
The full repository of this tutorial is available here.
Part 1. Intro to Docker
Installing Docker [Desktop GUI] on Windows2
To install Docker Desktop on Windows I perform two steps:
- Download the
Docker Desktop Installer.exefile. - Install it, e.g. by running the following command in the Windows Command Prompt:
start /w "" "Docker Desktop Installer.exe" install
When starting Docker Desktop for the first time, it prompts you to agree for terms and conditions. It can also ask to update/install the wsl (Windows Subsystem for Linux) engine by running wsl --update:
wsl --update
Installing: Windows Subsystem for Linux
Windows Subsystem for Linux has been installed.
NOTE: Docker for Windows utilizes WSL as the backend for running Linux containers on Windows. WSL enables Windows users to run a Linux distribution alongside Windows, providing a compatibility layer that allows execution of Linux binaries and running Linux-based applications. Docker for Windows internally handles the integration with WSL and leverages this functionality to ensure a consistent development environment for working with Docker images and containers, resulting in a seamless experience for running Linux containers on Windows.
First Image - First Container
A container is a runtime environment for an image. Let’s break it down.
First, we clone an example repository using the following command:
git clone https://github.com/docker/welcome-to-docker
In this example, the repository already contains a Dockerfile. Typically, you would need to create a Dockerfile before proceeding with the following steps, as I will show later.
Next, we can build an image using the docker build command in your project folder (make sure you navigate to the relevant folder):
docker build -t welcome-to-docker .
The -t flag tags the image with a name (welcome-to-docker in this case), and the . indicates that Docker can find the Dockerfile in the current folder.
Once the build process is complete, the image will appear in the Images tab of Docker Desktop. Alternatively, you can list the local images using the command prompt:
docker images
To create a container based on an image, select the image and click Run. Fill in the Container name and Host port (e.g., 8080) under Optional settings, and then click Run.
Alternatively, you can use the command prompt:
docker run -p 8080:5000 --name welcome-to-docker-app welcome-to-docker
The docker run command is used to create and start a new Docker container. The -p flag publishes and maps port 8080 of the host machine to port 5000 in the container. The --name welcome-to-docker-app sets a name for the container, and welcome-to-docker refers to the name of the Docker image that you want to run as a container.
NOTE: Specifying the container port allows you to explicitly define which port(s) inside the container will be exposed and accessible from the host machine or other containers. In the example above, port 5000 inside the container is mapped to port 8080 on the host machine. Therefore, you can access your Python application by using localhost:8080 in a web browser and have control over the network configuration between the container and the host machine or other containers.
Afterward, the new container will appear in the Containers tab of Docker Desktop, and you can view the frontend.
Useful Commands
In addition to docker run, there are several essential commands for managing Docker containers and images through the command prompt.
Basic functionality
To list the currently running containers, you can use the following command:
docker ps
The docker ps command displays information such as the container ID, used image, container name, status, and port mapping. To view the full list of containers, including the ones not currently running, you can use the -a option:
docker ps -a
Similarly, to list the available Docker images on your system, you can use the following command:
docker images
The docker images command shows the image ID, repository, tag, and size.
To stop a container, you can use the following command, replacing <container_name_or_id> with the actual name or ID of the container:
docker stop <container_name_or_id>
Conversely, if you want to start a stopped container, you can use the following command:
docker start <container_name_or_id>
To view the logs generated by a specific container and inspect its activities or debug any issues, you can use the following command:
docker logs <container_name_or_id>
To remove one or more containers from your system, you can use the following command:
docker rm <container_name_or_id>
Likewise, to remove one or more images from your system, you can use the following command:
docker rmi <image_name_or_id>
docker rm is used to remove one or more containers from your system.
Inspect Container
There is one essential command that can help you gain a better understanding of Docker containers. This command is particularly useful when you need to retrieve specific information about a container, such as environment variables or network settings. The output of docker inspect provides a comprehensive understanding of the container’s configuration and state. It can be used to programmatically extract specific fields or properties or to gather detailed information about the container.
docker inspect <container_name_or_id>
The docker inspect command retrieves detailed information about a Docker container. When executed, Docker provides a JSON-formatted output containing various details and configurations associated with the specified container. Some of the information includes:
- Container ID and name
- Container status and state
- Image name and ID
- Network configuration
- Volume mounts
- Environment variables
- Exposed ports
- Container runtime parameters, and more.
NOTE: The output of docker inspect can be quite lengthy and detailed. To enhance readability, you can format the output using tools like jq or filter specific fields using the --format option of the docker inspect command.
Interact with a Running Container
To enter a running Python container and access its shell or command line interface, one can use the docker exec command. First, identify the name or ID of the running Python container. You can use the docker ps command to list all running containers:
docker ps
Once you have identified the container, you can use the docker exec command to enter it:
docker exec -it <container_name_or_id> bash
root@763d96abefeb:/#
NOTE: the command bash is used here assuming the Python container has Bash installed. If the container uses a different shell, such as sh, zsh, or fish, replace bash with the appropriate shell name.
To exit the container’s shell and return to your host system’s shell, you can type exit or press Ctrl + D.
Running a Python Container
Let’s consider the following scenario. I need to develop a data pipeline in Python, which can be an E[T]L[T] pipeline. In this pipeline, data is extracted from a source, optionally transformed, loaded into the destination (analytical storage), where downstream transformation takes place.
Chances are, that to accomplish this task, I may need to use the pandas library. Therefore, I will have to interact with the environment of a Docker container running a Python image. This will allow me to install the pandas library and access the shell of the Docker container.
To launch a Docker container based on a python image and start an interactive session with a bash shell as the entrypoint, I can use the following command:
docker run -it --entrypoint=bash python
By running the command above, I can create and enter a Docker container where I have access to the Python image and can install additional libraries. This environment enables me to build and execute my Python data pipeline. Here is a step-by-step breakdown of the command:
docker run: This command is used to create and start a new Docker container.-it: These options combined make the container “interactive”, allowing you to interact with the container’s shell.--entrypoint=bash: This option specifies that theentrypointfor the container should be set to thebashshell. The entrypoint is the command that is executed when the container starts. By setting it tobash, I override the defaultentrypointdefined in the Docker image, e.g.pythonprompt, and start abashshell instead.python: This argument specifies the name of the Docker image to use for the container. In this case, it is the Python image. The Docker daemon will pull the Python image from a Docker registry if it is not already available locally.
NOTE: The python images come in many flavors, each designed for a specific use case (link); however, the provided command does not explicitely include a version tag for the Python image, so it actually refers to the latest version available at the time of pulling, python:latest. In general, relying on the latest tag can potentially lead to compatibility issues or unexpected behavior if the base image gets updated.
Running the last command results in a sequence of messages:
Unable to find image 'python:latest' locally
latest: Pulling from library/python
918547b94326: Pull complete
5d79063a01c5: Pull complete
4eedd9c5abf7: Pull complete
9cdadd40055f: Pull complete
2a12d0031f3f: Pull complete
24685c45a066: Pull complete
6ba57ec00f34: Pull complete
71bcc9787aa7: Pull complete
Digest: sha256:b9683fa80e22970150741c974f45bf1d25856bd76443ea561df4e6fc00c2bc17
Status: Downloaded newer image for python:latest
root@763d96abefeb:/#
The Docker daemon did not find the python:latest image in my local Docker registry, looked up for the latest version of the python image from the default Docker registry, library/python, successfully fetched 8 layers to download it, started the container on my local machine, and logged me as the root user inside the container, meaning that instead of the, default, python prompt, I am using the bash prompt and can execute bash commands:
pip install pandas
Upon running this command, the necessary packages are downloaded and installed:
Collecting pandas
  Downloading pandas-2.0.1-cp311-cp311-manylinux_2_17_x86_64.manylinux2014_x86_64.whl (12.2 MB)
     ━━━━━━━━━━━━━━━━━━━━━━━━━━━━━━━━━━━━━━━━ 12.2/12.2 MB 4.4 MB/s eta 0:00:00
Collecting python-dateutil>=2.8.2
  Downloading python_dateutil-2.8.2-py2.py3-none-any.whl (247 kB)
     ━━━━━━━━━━━━━━━━━━━━━━━━━━━━━━━━━━━━━━━━ 247.7/247.7 kB 2.2 MB/s eta 0:00:00
Collecting pytz>=2020.1
  Downloading pytz-2021.3-py2.py3-none-any.whl (502 kB)
     ━━━━━━━━━━━━━━━━━━━━━━━━━━━━━━━━━━━━━━━━ 502.3/502.3 kB 2.9 MB/s eta 0:00:00
Collecting tzdata>=2022.1
  Downloading tzdata-2021.3-py2.py3-none-any.whl (341 kB)
     ━━━━━━━━━━━━━━━━━━━━━━━━━━━━━━━━━━━━━━━━ 341.8/341.8 kB 2.4 MB/s eta 0:00:00
Collecting numpy>=1.21.0
  Downloading numpy-1.24.3-cp311-cp311-manylinux_2_17_x86_64.manylinux2014_x86_64.whl (17.3 MB)
     ━━━━━━━━━━━━━━━━━━━━━━━━━━━━━━━━━━━━━━━━ 17.3/17.3 MB 5.2 MB/s eta 0:00:00
Collecting six>=1.5
  Downloading six-1.16.0-py2.py3-none-any.whl (11 kB)
Installing collected packages: pytz, tzdata, six, numpy, python-dateutil, pandas
Successfully installed numpy-1.24.3 pandas-2.0.1 python-dateutil-2.8.2 pytz-2021.3 six-1.16.0 tzdata-2021.3
Now, we can run the Python prompt and execute Python commands:
python
>>> import pandas
>>> pandas.__version__
The last command will result in the pandas version being printed out:
'2.0.1'
Installing Libraries On-the-Go
Let’s imagine that you have happily started a Python container and are halfway through a data exploration journey when you realize that a critical library is missing. Now, you need to install it without accidentally disrupting your container’s data. The easiest way to install a library on the fly, while keeping your container running and your data intact, is by using another command prompt or terminal outside the container. You can utilize the familiar docker exec command we discussed earlier to execute a command within the running container:
docker exec -it <container_name_or_id> pip install <library_name>
After the library installation process is complete, you can close the additional window and seamlessly continue building your code.
Part 2. Juggling Containers with Dockerfiles
Let’s delve further into our scenario: I have developed a data pipeline, tested it, and now I am ready to deploy it. To do that, I need to package it into its own Docker container, which, in turn, means I need to build a Docker image from my data pipeline and prepare it for deployment in a specific environment.
For demonstration purposes, I will use the following mock script named pipeline.py:
import pandas as pd
test_series = pd.Series([1, 2, 3])
print(f'job finished successfully:\n{test_series}')
Dockerfile v0 - Direct Access
To build a Docker image from an application, we need to include the application’s contents in a Dockerfile. The Dockerfile serves as essentially a blueprint for creating Docker images, containing the instructions and dependencies required to run the application. The Dockerfile starts by specifying a base image:
FROM python:3.10
Next, we can run commands, such as installing the pandas library:
RUN pip install pandas
As seen earlier, we can also define the entrypoint:
ENTRYPOINT ["bash"]
Furthermore, we can set the working directory in the container, which is the location where we will copy the application file. For example:
WORLDIR /app
To run the data pipeline, we should copy its file from the current working directory on the host machine to the destination working directory in the image:
COPY pipeline.py pipeline.py
Alltogether, the Dockerfile will look as follows:
FROM python:3.10

RUN pip install pandas

WORKDIR /app
COPY pipeline.py pipeline.py

ENTRYPOINT ["bash"]
I add this Dockerfile to my current working directory (which contains the application file). Now, I can use the docker build command to build the image:
docker build -t pipeline-test-image .
When I run it, I end up in the /app directory, which contains the pipeline.py file. From the container shell, I can execute the pipeline:
docker run -it pipeline-test-image
root@763d96abefeb:/app#
root@763d96abefeb:/app# ls
pipeline.py
root@763d96abefeb:/app# python pipeline.py
job finished successfully:
0    1
1    2
2    3
dtype: int64
Dockerfile v1 - Automated Execution
Now, I want to enhance the Dockerfile so that containers based on the corresponding image become “self-sufficient.” This means that users do not need to manually execute the pipeline.py script or manipulate the results themselves. Instead, they can run the container while providing the necessary parameters. The container will then retrieve the data meeting the specified parameter values, apply the transformations defined in the pipeline, and send the results to the appropriate destination.
Let’s modify our pipeline.py script to utilize the sys module, specifically the sys.argv function, which allows passing command-line arguments to the script.
import sys
import pandas as pd
series_name = sys.argv[1]
test_series = pd.Series([1, 2, 3], name=series_name)

print(f'passed command-line arguments: {sys.argv}')
print(f'job finished successfully:\n{test_series}')
NOTE: sys.argv[0] contains the name of the file passed to the docker run command.
Next, I want Docker to execute pipeline.py when I run the container. Therefore, I need to modify the Dockerfile:
FROM python:3.10

RUN pip install pandas

WORLDIR /app
COPY pipeline.py pipeline.py

ENTRYPOINT ["python", "pipeline.py"]
Now, I can build the new image:
docker build -t pipeline-test-image .
When I run it, I pass an additional argument, which represents the name I want to assign to the resulting pandas Series:
docker run -it pipeline-test-image test_series
passed command-line arguments: ['pipeline.py', 'test_series']
job finished successfully:
0    1
1    2
2    3
Name: test_series, dtype: int64
Adding a Postgres Container
What I actually want to accomplish, is to to build functionality to read source data (e.g., from source csv files), perform the necessary manipulations, and save the results in a database. For this purpose, a Postgres instance will be used. Let’s run a Postgres container in Docker and use a simple Python script to populate it with data.
To run a Postgres container, we need to configure it. One part of the configuration involves using environmental variables. For Postgres, we require USER, PASSWORD, and the database name3. To set environmental variables when running a Docker container, use the -e flag:
docker run -it \
  -e POSTGRES_USER="root" \
  -e POSTGRES_PASSWORD="root" \
  -e POSTGRES_DB="postgres_test_db" \
postgres:13
Another aspect of the configuration involves Docker volumes, which ensure data persistence in Docker. Since a database needs to store files in the file system, saving records requires specifying a location where the corresponding files can be stored. However, containers have their own isolated file systems, and when a container is stopped, the data stored within it is lost. To address this, Docker volumes provide a solution by mapping a folder on the host machine to a folder within the container.
In simpler terms, Docker volumes enable the connection between a physical folder on the host machine and the virtual file system of Docker. By mounting the host folder to the container, the actual data from the database remains accessible even when the container is stopped and started again. Furthermore, any changes made to the data while the container is running are automatically synchronized and replicated in the host file system. This allows the data to persist between container restarts.
To achieve this, the -v flag is used in the Docker command, allowing the specification of the volume mapping:
docker run -it \
  -e POSTGRES_USER="root" \
  -e POSTGRES_PASSWORD="root" \
  -e POSTGRES_DB="postgres_test_db" \
  -v C:/../postgres_data_host: /var/lib/postgresql/data \
postgres:13
Additionally, to access and send requests to the database, we need to map a port on the host machine to a port on the container. The standard port number for Postgres is 5432. However, if Postgres is already installed on the local machine, which is the case for me, another port (e.g., 5431) needs to be mapped to the container. Use the -p flag for port mapping:
docker run -it \
  -e POSTGRES_USER="root" \
  -e POSTGRES_PASSWORD="root" \
  -e POSTGRES_DB="postgres_test_db" \
  -v C:/../postgres_data_host:/var/lib/postgresql/data \
  -p 5431:5432 \
postgres:13
Now, let’s run this command:
Unable to find image 'postgres:13' locally
13: Pulling from library/postgres
9e3ea8720c6d: Pull complete
7782b3e1be4b: Pull complete
247ec4ff783a: Pull complete
f7ead6900700: Pull complete
e7afdbe9a191: Pull complete
3ef71fe7cece: Pull complete
1459ebb56be5: Pull complete
3595124f6861: Pull complete
21d1b00b8369: Pull complete
aa0f5cff9b82: Pull complete
ac773378c58e: Pull complete
9f6cf64ad0b2: Pull complete
64705da81f0c: Pull complete
Digest: sha256:ce2086148580daf694c72ced7e1f452d5dd46e9118c9273a29e2343b3289a4ef
Status: Downloaded newer image for postgres:13
The files belonging to this database system will be owned by user "postgres".
This user must also own the server process.

The database cluster will be initialized with locale "en_US.utf8".
The default database encoding has accordingly been set to "UTF8".
The default text search configuration will be set to "english".

Data page checksums are disabled.

fixing permissions on existing directory /var/lib/postgresql/data ... ok
creating subdirectories ... ok
selecting dynamic shared memory implementation ... posix
selecting default max_connections ... 100
selecting default shared_buffers ... 128MB
selecting default time zone ... Etc/UTC
creating configuration files ... ok
running bootstrap script ... ok
performing post-bootstrap initialization ... ok
syncing data to disk ... ok

initdb: warning: enabling "trust" authentication for local connections
You can change this by editing pg_hba.conf or using the option -A, or
--auth-local and --auth-host, the next time you run initdb.

Success. You can now start the database server using:

    pg_ctl -D /var/lib/postgresql/data -l logfile start

waiting for server to start....2021-05-22 07:19:23.737 UTC [49] LOG:  starting PostgreSQL 13.11 (Debian 13.11-1.pgdg110+1) on x86_64-pc-linux-gnu, compiled by gcc (Debian 10.2.1-6) 10.2.1 20210110, 64-bit
2021-05-22 07:19:23.743 UTC [49] LOG:  listening on Unix socket "/var/run/postgresql/.s.PGSQL.5432"
2021-05-22 07:19:23.801 UTC [50] LOG:  database system was shut down at 2021-05-22 07:19:12 UTC
2021-05-22 07:19:23.852 UTC [49] LOG:  database system is ready to accept connections
 done
server started
CREATE DATABASE


/usr/local/bin/docker-entrypoint.sh: ignoring /docker-entrypoint-initdb.d/*

2021-05-22 07:19:28.414 UTC [49] LOG:  received fast shutdown request
waiting for server to shut down...2021-05-22 07:19:28.422 UTC [49] LOG:  aborting any active transactions
.2021-05-22 07:19:28.425 UTC [49] LOG:  background worker "logical replication launcher" (PID 56) exited with exit code 1
2021-05-22 07:19:28.425 UTC [51] LOG:  shutting down
2021-05-22 07:19:28.598 UTC [49] LOG:  database system is shut down
 done
server stopped

PostgreSQL init process complete; ready for start up.

2021-05-22 07:19:28.700 UTC [1] LOG:  starting PostgreSQL 13.11 (Debian 13.11-1.pgdg110+1) on x86_64-pc-linux-gnu, compiled by gcc (Debian 10.2.1-6) 10.2.1 20210110, 64-bit
2021-05-22 07:19:28.702 UTC [1] LOG:  listening on IPv4 address "0.0.0.0", port 5432
2021-05-22 07:19:28.702 UTC [1] LOG:  listening on IPv6 address "::", port 5432
2021-05-22 07:19:28.724 UTC [1] LOG:  listening on Unix socket "/var/run/postgresql/.s.PGSQL.5432"
2021-05-22 07:19:28.785 UTC [64] LOG:  database system was shut down at 2021-05-22 07:19:28 UTC
2021-05-22 07:19:28.845 UTC [1] LOG:  database system is ready to accept connections
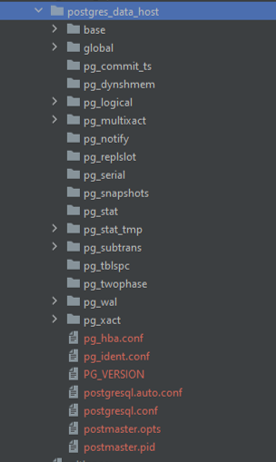
The container is now up and running, and we can see the mapped folder on the local machine.
To access the database, we can use the Postgres command line. If necessary, install the pgcli library:
pip install pgcli
NOTE: You may need to install other modules as well, such as psycopg-binary and psycopg2:
pip install psycopg-binary
pip install psycopg2
Now, I can use the pgcli prompt to access the database:
pgcli -h 127.0.0.1 -p 5431 -u root -d postgres_test_db
When prompted, enter the password that was defined for the container (in this case, root):
C:\..>pgcli -h 127.0.0.1 -p 5431 -u root -d postgres_test_db
Password for root:
Server: PostgreSQL 13.11 (Debian 13.11-1.pgdg110+1)
Version: 3.5.0
Home: http://pgcli.com
root@127:postgres_test_db>
I am now connected to Postgres and can test the connection to the database. For example, let’s list the available tables:
root@127:postgres_test_db>\dt
+--------+------+------+-------+
| Schema | Name | Type | Owner |
|--------+------+------+-------|
+--------+------+------+-------+
SELECT 0
Time: 0.048s
root@127:postgres_test_db>
The database is currently empty, but everything is functioning as expected.
The Container Crew
At this point, I have two containers, Python and Postgres, are up and running, and I need them to talk with each other (aka being on the same network). Connecting containers into a network offers several benefits, but for now, we’ll focus on ensuring a seamless data flow between my application and the database. This way, my Python code can interact with the database for storing, retrieving, and manipulating data while running independently without interfering with the Postgres environment.
To create a Docker network that connects two running containers, I follow these steps:
- Create a Docker network by executing the
docker network create <network_name>command:
docker network create python_postgres
- Connect containers to the network using the
docker network connect --alias <container_alias> <network_name> <container_name_or_id>command:
docker network connect --alias pstgr_cont python_postgres 5e044f525ba5
docker network connect python_postgres 763d96abefeb
The network name of the Postgres container will be used by the Python connector in the Python container as the hostname. I execute the above commands in a separate command prompt.
NOTE: Containers within a network can be paused, restarted, and stopped. A container connects to its configured networks when it runs. Refer to the documentation for more details.
Now, let’s return to the Python container and set up the necessary connector. In Python, we can accomplish this using the sqlalchemy library, which acts as a wrapper for another library called psycopg2. To install both libraries, access the container shell through another command prompt (see Installing Libraries On-the-Go):
docker exec -it <container_name_or_id> pip install sqlalchemy psycopg2
After importing the required module from the sqlalchemy library, I can create a connecting engine:
from sqlalchemy import create_engine
engine = create_engine('postgresql://root:root@pstgr_cont:5432/postgres_test_db')
NOTE: Unlike accessing the database directly from the local machine, we now access the Postgres container from within the network: instead of using localhost, we utilize the network alias of the Postgres container as the host and connect to the Postgres container port.
Loading Data to Postgres
Let’s explore how to use Python to read data and load it into Postgres.
To download a csv file from the web, we can use the wget command-line utility. It is commonly used for retrieving files, scripts, and web pages. By specifying the URL of the file, wget retrieves it and saves it to the specified location. wget supports various protocols like HTTP, HTTPS, FTP, and more. Below is an example of using wget to download a file.
In this case, I will use the Accelerometer Data Set hosted on the Machine Learning Repository by the University of California, Irvine. This dataset was utilized in the Prediction of Motor Failure Time Using An Artificial Neural Network project.
wget https://archive.ics.uci.edu/ml/machine-learning-databases/00611/accelerometer.csv
--2021-05-22 10:48:35--  https://archive.ics.uci.edu/ml/machine-learning-databases/00611/accelerometer.csv
Resolving archive.ics.uci.edu (archive.ics.uci.edu)... 128.195.10.252
Connecting to archive.ics.uci.edu (archive.ics.uci.edu)|128.195.10.252|:443... connected.
HTTP request sent, awaiting response... 200 OK
Length: 3731094 (3.6M) [application/x-httpd-php]
Saving to: ‘accelerometer.csv’

accelerometer.csv     100%[====================================================>]   3.56M  1.45MB/s    in 2.5s

2021-05-22 10:48:50 (1.45 MB/s) - ‘accelerometer.csv’ saved [3731094/3731094]

root@763d96abefeb:/#
Let’s check how many lines there are in the accelerometer.csv file:
wc -l accelerometer.csv
153001 accelerometer.csv
root@763d96abefeb:/#
The file contains 153,000 lines, plus the header.
Now, let’s enter the Python prompt and explore this dataset using pandas:
root@763d96abefeb:/# python
Python 3.11.3 (main, May  4 2023, 05:53:32) [GCC 10.2.1 20210110] on linux
Type "help", "copyright", "credits" or "license" for more information.
>>> import pandas as pd
>>> acc_raw_data = pd.read_csv('accelerometer.csv')
>>> acc_raw_data.head()
   wconfid  pctid      x      y      z
0        1     20  1.004  0.090 -0.125
1        1     20  1.004 -0.043 -0.125
2        1     20  0.969  0.090 -0.121
3        1     20  0.973 -0.012 -0.137
4        1     20  1.000 -0.016 -0.121
>>> acc_raw_data.info()
<class 'pandas.core.frame.DataFrame'>
RangeIndex: 153000 entries, 0 to 152999
Data columns (total 5 columns):
 #   Column   Non-Null Count   Dtype
---  ------   --------------   -----
 0   wconfid  153000 non-null  int64
 1   pctid    153000 non-null  int64
 2   x        153000 non-null  float64
 3   y        153000 non-null  float64
 4   z        153000 non-null  float64
dtypes: float64(3), int64(2)
memory usage: 5.8 MB
>>>
As mentioned in the dataset description, the dataset contains 5 attributes:
wconfid- weight configuration ID,pctid- cooler fan RPM speed percentage,- and coordinates
x,y, andz. Coordinates are infloatvalues, while the speed percentage isinteger, no missing values.
NOTE: In this case, we do not have any date columns that usually require transformation (casting string/object date values to datetime) before uploading. Therefore, we can proceed with the loading process.
To insert this data into our Postgres database, we need to generate its schema. We can accomplish this by using the built-in pandas.io.sql.get_schema method. Let’s see what the schema looks like:
>>> acc_schema = pd.io.sql.get_schema(acc_raw_data, name='acc_table')
>>> print(acc_schema)
CREATE TABLE "acc_table" (
  "wconfid" INTEGER,
  "pctid" INTEGER,
  "x" REAL,
  "y" REAL,
  "z" REAL
)
NOTE: As mentioned earlier, casting the data types, like casting string/object date values to datetime, can be an essential first step before generating a schema. If the data is ingested in chunks, type casting should be performed within the ingestion loop.
To create the required table while connected to the database, we can run the following command:
>>> pd.io.sql.get_schema(acc_raw_data, name='acc_table', con=engine)
Alternatively, to keep it cleaner, we can use the header row of the source file:
>>> pd.read_csv('accelerometer,csv').head(n=0).to_sql(name='accelerometer_data', con=engine, if_exists='replace')
If we return to the pgcli prompt of the Postgres container and list the tables, we will see the accelerometer_data table:
root@127:postgres_test_db>\dt
+--------+------------------+-------+-------+
| Schema | Name             | Type  | Owner |
|--------+------------------+-------+-------|
| public | accelerometer_data | table | root  |
+--------+------------------+-------+-------+
SELECT 1
Time: 0.057s
root@127:postgres_test_db>
Before proceeding with data ingestion, I need to divide the source data into manageable chunks to ensure the pipeline functions independently of the source file’s size. To accomplish this, I employ the pandas iterator:
>>> df_iter = pd.read_csv('accelerometer.csv', iterator=True, chunksize=50000)
>>> df=next(df_iter)
>>> len(df)
50000
Now that I have the table set up, I can start uploading the data by appending entries to the existing table. For example, let’s upload the first chunk:
>>> df.to_sql(name='accelerometer_data', con=engine, index=False, if_exists='append')
If I return to the pgcli prompt of the Postgres container and count the lines in our table, I should find 50,000 entries:
SELECT count(1) FROM accelerometer_data;
+-------+
| count |
|-------|
| 50000 |
+-------+
SELECT 1
Time: 0.024s
root@127:postgres_test_db>
Alternatively, I can query the data directly using the pandas.read_sql method:
pd.read_sql("""SELECT * FROM accelerometer_data LIMIT 10""", con=engine)
   wconfid  pctid      x      y      z
0      1     20  1.004  0.090 -0.125
1      1     20  1.004 -0.043 -0.125
2      1     20  0.969  0.090 -0.121
3      1     20  0.973 -0.012 -0.137
4      1     20  1.000 -0.016 -0.121
5      1     20  0.961  0.082 -0.121
6      1     20  0.973 -0.055 -0.109
7      1     20  1.000  0.012 -0.133
8      1     20  0.969 -0.102 -0.141
9      1     20  0.973 -0.059 -0.125
Data Ingestion Script
In the previous section, I uploaded only the first chunk of the data. To ingest all the chunks, I can use a while loop as follows:
df_iter = pd.read_csv('accelerometer.csv', iterator=True, chunksize=50000)
i = 1
while True:
	try:
		df = next(df_iter)
        df.to_sql(name='accelerometer_data', con=engine, index=False, if_exists='append')
        print(f'inserted chunk {i}')
		i += 1

    except StopIteration:
        print("Finished ingesting data into the postgres database, {i} chunks.")
        break
My task now is to write a script. To make it reusable and allow to dynamically overwrite parameter values for a given run, I will parametrize the main function. I also introduce a supporting function, to fetch the file name, and some basic error handling. The file will be called ingest_data.py.
Note: Python has its own wget library (with slightly different syntax) for file downloads. To install it in the Python container, use the following command from a new command prompt:
docker exec -it 763d96abefeb bash
root@763d96abefeb:/# pip install wget
Collecting wget
  Downloading wget-3.2.zip (10 kB)
  Preparing metadata (setup.py) ... done
Building wheels for collected packages: wget
  Building wheel for wget (setup.py) ... done
  Created wheel for wget: filename=wget-3.2-py3-none-any.whl size=9657 sha256=dc5703b...
  Stored in directory: /root/.cache/pip/wheels/f0/e4/9c/b3ed593784fe0147db216173b4...
Successfully built wget
Installing collected packages: wget
Successfully installed wget-3.2
root@763d96abefeb:/#
The ingest_data.py file functions:
import wget
from urllib.error import HTTPError

import sys
import argparse

from time import time

import pandas as pd
from sqlalchemy import create_engine


def __fetch_downloaded_file_name(url_string):
    file_name = url_string.split('/')[-1]
    if url_string.endswith('.csv.gz') or url_string.endswith('.csv'):
        return file_name
    else:
        return ''


def main(params):
    """ The function takes a set of parameters, reads a csv file, and uploads it into
    a Postgres db table. During the upload it reports how much time it took to upload
    each chunk and how many chunks have been uploaded.
    """
    user = params.user
    password = params.password
    host = params.host
    port = params.port
    db = params.db
    table_name = params.table_name
    url = params.url

    # the backup files can be gzipped
    # keep the correct extension for pandas to be able to open the file
    csv_name = __fetch_downloaded_file_name(url)
    if csv_name:
        try:
            wget.download(url)
        except HTTPError:
            sys.exit(f'HTTP error, file not found at {url}')

    else:
        sys.exit(f'Unknown file format at {url}')

    engine = create_engine(f'postgresql://{user}:{password}@{host}:{port}/{db}')

    pd.read_csv(csv_name).head(n=0).to_sql(
	name=table_name, con=engine, index=False, if_exists='replace'
    )
    df_iter = pd.read_csv(csv_name, iterator=True, chunksize=50000)

    i = 1
    while True:

        try:
            t_start = time()

            df = next(df_iter)

            df.to_sql(name=table_name, con=engine, index=False, if_exists='append')

            t_end = time()

            print(f'inserted chunk {i}, took {(t_end - t_start):.3f} second')
            i += 1

        except StopIteration:
            print(f"Finished ingesting data into the postgres database, {i - 1} chunks.")
            break
The runner will parse the option string and pass the arguments to the ingest_data function:
if __name__ == '__main__':
    parser = argparse.ArgumentParser(description='Ingest CSV data to Postgres')

    parser.add_argument('--user', required=True, help='user name for postgres')
    parser.add_argument('--password', required=True, help='password for postgres')
    parser.add_argument('--host', required=True, help='host for postgres')
    parser.add_argument('--port', required=True, help='port for postgres')
    parser.add_argument('--db', required=True, help='database name for postgres')
    parser.add_argument(
	    '--table_name', required=True,
	    help='name of the table where we will write the results to'
    )
    parser.add_argument('--url', required=True, help='url of the csv file')

    args = parser.parse_args()

    ingest_data(args)
NOTE: To test how the script works, we need to drop the accelerometer_data table if we want to use the same name.
Let’s check if the script works by running the following command from the location of the ingest_data.py file:
python ingest_data.py \
  --user=root --password=root \
  --host=127.0.0.1 --port=5431 \
  --db=postgres_test_db --table_name=accelerometer_data \
  -url=https://archive.ics.uci.edu/ml/machine-learning-databases/00611/accelerometer.csv
NOTE: passing the password directly in the terminal is, of course, an unacceptable practice. I am breaking the rules here to simplify the example.
The output of the script should resemble the following:
100% [...........................................................] 3731094 / 3731094
accelerometer.csv downloaded.
inserted chunk 1, took 1.247 second
inserted chunk 2, took 1.494 second
inserted chunk 3, took 1.316 second
inserted chunk 4, took 0.093 second
Finished ingesting data into the postgres database, total num of chunks = 4
Now, when I return to the pgcli prompt for the Postgres container and count the lines in our table, all 153,000 entries will appear:
SELECT count(1) FROM accelerometer_data;
+--------+
| count  |
|--------|
| 153000 |
+--------+
SELECT 1
Time: 0.117s
root@127:postgres_test_db>
Alternatively, I can query the data directly using the pandas.read_sql method from the Python container on our network. Let’s access the last row:
pd.read_sql("""SELECT * FROM accelerometer_data LIMIT 1 OFFSET 153000-1""", con=engine)
   wconfid  pctid      x      y      z
0        3    100  1.199 -0.176  0.109
Dockerfile v2 - Data Pipeline App
So far, we have discussed Docker, creating and running containers, and connecting containers into a network. Additionally, we have written a data ingestion script. To create a fully functional pipeline, we now need to containerize that script using Docker.
To execute the ingest_data.py script from a container, modifications are required in the Dockerfile. In addition to pandas, I need to install psycopg2 and sqlalchemy to access the database in the Postgres container, and the wget module to download files from the web.
FROM python:3.10

RUN pip install pandas psycopg2 sqlalchemy wget

WORKDIR /app
COPY ingest_data.py ingest_data.py

ENTRYPOINT [ "python", "ingest_data.py" ]
Next, I build the image:
docker build -t accelerometer_pipeline:0.0.1 .
Building the image took approximately 34 seconds:
[+] Building 33.4s (9/9) FINISHED
 => [internal] load .dockerignore                                                 0.0s
 => => transferring context: 2B                                                   0.0s
 => [internal] load build definition from Dockerfile                              0.1s
 => => transferring dockerfile: 204B                                              0.0s
 => [internal] load metadata for docker.io/library/python:3.10                    2.3s
 => CACHED [1/4] FROM docker.io/library/python:3.10@sha256:f5ef86211c0ef0db2e...  0.0s
 => [internal] load build context                                                 0.0s
 => => transferring context: 36B                                                  0.0s
 => [2/4] RUN pip install pandas sqlalchemy psycopg2 wget                         29.2s
 => [3/4] WORKDIR /app                                                            0.2s
 => [4/4] COPY ingest_data.py ingest_data.py                                      0.2s
 => exporting to image                                                            1.5s
 => => exporting layers                                                           1.5s
 => => writing image sha256:17ebc2e45bb0eef04d843a799ccc425f90cf45b3305c8...      0.0s
 => => naming to docker.io/library/accelerometer_pipeline:0.0.1                   0.0s
We can now see the image listed:
docker images
REPOSITORY               TAG       IMAGE ID       CREATED              SIZE
accelerometer_pipeline   0.0.1     17ebc2e45bb0   About a minute ago   1.11GB
postgres                 13        a7ec00098633   3 hours ago          374MB
python                   latest    815c8c75dfc0   4 hours ago          920MB
NOTE: Our simple Dockerfile produced a >1 GB image, which means the Docker build needs to be optimized.
Let’s run this image. Since we need a Postgres container for the job to be executed, I need to run it within the network that contains the Postgres container. As a reminder, our network is named python_postgres, and the database’s alias is pstgr_cont with port 5432. To keep both the previous version of the table and the new one, I will give a different name to the table:
docker run -it --network python_postgres accelerometer_pipeline:0.0.1 \
  --user=root --password=root \
  --host=pstgr_cont --port=5432 \
  --db=postgres_test_db --table_name=accelerometer_data_dock \
  --url=https://archive.ics.uci.edu/ml/machine-learning-databases/00611/accelerometer.csv
100% [................................................................] 3731094 / 3731094
accelerometer.csv downloaded.
inserted chunk 1, took 1.335 second
inserted chunk 2, took 1.235 second
inserted chunk 3, took 1.208 second
inserted chunk 4, took 0.080 second
Finished ingesting data into the postgres database, total num of chunks = 4
NOTE: As I am running a Docker container, I do not need to be located in a specific local directory.
Now, we have two tables: the one created when running the script directly for testing purposes, and the second one (with the _dock suffix) created by running a container from the accelerometer_pipeline app image.
Part 3. Putting It All Together - Running Python Postgres App with Docker Compose
In the previous section, we saw how to package our ingestion script to Docker. However, we encountered some challenges while running Python and Postgres together using separate Docker commands, which required a complex configuration. Instead, I can use Docker Compose, which allows to define and run multi-container setups using one YAML configuration file. Docker compose simplifies the management of multi-container Docker applications by encapsulating services, networks, volumes, and their intricate relationships within a single configuration file.
Establishing the Project
Let’s build a simple Python web application utilizing our ingest_data.py script. First, I create a project directory. I will do that within my better-python-with-ci-cd repository. Whithin the project directory, I will create separate folders for the app, database, and configuration files. The latter will contain environmental variables necessary for the ingest_data.py script to run and for setting up the Postgres database. I will add to the .gitignore file to ensure its content is stored locally and not pushed to the remote repository.
mkdir docker_python_postgres_tutorial
cd .\docker_python_postgres_tutorial\
mkdir app
mkdir database
mkdir config
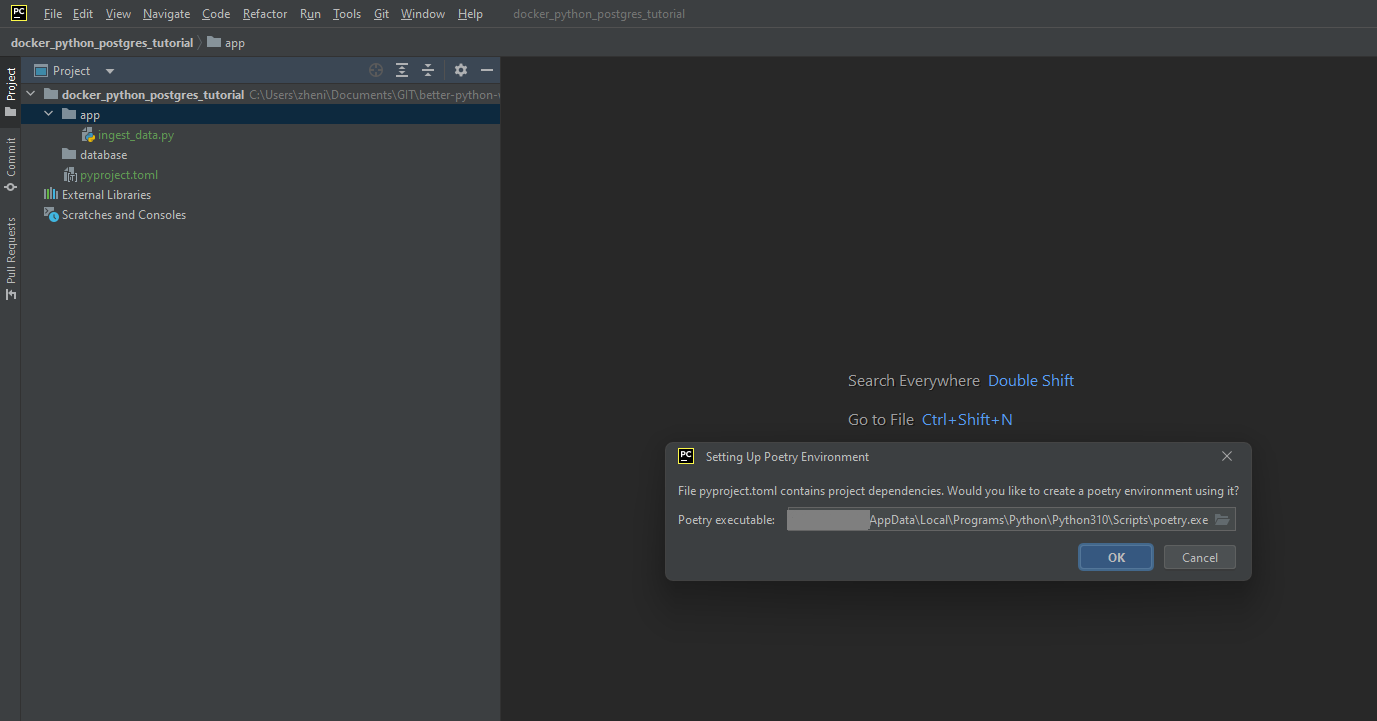
The next step is to define dependencies4:
- I add a
pyproject.tomlfile. - I reopen the
docker_python_postgres_tutorialas a separate project in a new PyCharm window, which allows PyCharm to automatically detect the presence of thepyproject.tomlfile and suggest creating a Poetry environment based on its content. Thus, I set up the project with the appropriate Poetry-based interpreter environment.
The App Side
I want to put the ingest_data.py script into the app folder. Let’s upgrade it to read the necessary connection arguments and other configuration parameters from a configuration file5:
import os
from dotenv import load_dotenv

import wget
from urllib.error import HTTPError

import sys
from time import time

import pandas as pd
from sqlalchemy import create_engine

load_dotenv('/app/python_connection.env')

def __fetch_downloaded_file_name(url_string):
    file_name = url_string.split('/')[-1]
    if url_string.endswith('.csv.gz') or url_string.endswith('.csv'):
        return file_name
    else:
        return ''


def main():
    """The script takes a set of Postgres database connection parameters, table name,
    and url, reads a csv file, and uploads it into a Postgres db table. During the
    upload it reports how much time it took to upload each chunk and how many chunks
    have been uploaded.
    """
    user = os.getenv("POSTGRES_USER")
    password = os.getenv("POSTGRES_PASSWORD")
    host = os.getenv("POSTGRES_HOST")
    port = os.getenv("POSTGRES_PORT")
    db = os.getenv("POSTGRES_DB")
    table_name = os.getenv("POSTGRES_TABLENAME")
    url = os.getenv("DATA_URL")

    print(user)
    print(url)

    # the backup files can be gzipped
    # keep the correct extension for pandas to be able to open the file
    csv_name = __fetch_downloaded_file_name(url)
    if csv_name:
        try:
            wget.download(url)
            print(f'\n{csv_name} downloaded.')
        except HTTPError:
            sys.exit(f'HTTP error, file not found at {url}')

    else:
        sys.exit(f'Unknown file format at {url}')

    engine = create_engine(f'postgresql://{user}:{password}@{host}:{port}/{db}')

    pd.read_csv(csv_name).head(n=0).to_sql(
	name=table_name, con=engine, index=False, if_exists='replace'
    )
    df_iter = pd.read_csv(csv_name, iterator=True, chunksize=50000)

    i = 1
    while True:

        try:
            t_start = time()

            df = next(df_iter)

            df.to_sql(name=table_name, con=engine, index=False, if_exists='append')

            t_end = time()

            print(f'inserted chunk {i}, took {(t_end - t_start):.3f} second')
            i += 1

        except StopIteration:
            print(f"Finished ingesting data into the postgres database, {i - 1} chunks.")
            break


if __name__ == '__main__':
    main()
NOTE: The environmental variables will be loaded from the python_connection.env file in the /app subdirectory of the container (load_dotenv('/app/python_connection.env' line). The python_connection.env file will be mounted to the /app subdirectory of the container as a volume during runtime from the /config subdirectory of the project. The file content includes:
POSTGRES_USER=root
POSTGRES_PASSWORD=root
POSTGRES_DB=machines_db
POSTGRES_HOST=database
POSTGRES_PORT=5432
POSTGRES_TABLENAME=accelerometer_raw
DATA_URL=https://archive.ics.uci.edu/ml/machine-learning-databases/00611/accelerometer.csv
NOTE: It’s important to communicate clearly to your team members or anyone else working on the project whatever names the .env files are given.
At this point, I create the Dockerfile for the ingest_data.py inside the /app folder. It should set up the environment by installing Poetry, copying the necessary files (pyproject.toml and ingest_data.py), configuring Poetry, and defining the entry point for running the script inside the Docker image:
FROM python:3.10

RUN pip3 install poetry==1.2.2

WORKDIR /app
COPY ./pyproject.toml .

RUN poetry config virtualenvs.create false && poetry install --no-root --without dev

ENV PYTHONPATH=${PYTHONPATH}:${PWD}
COPY ./app/ingest_data.py .


ENTRYPOINT ["poetry", "run", "python", "ingest_data.py"]
Let’s break it down:
- The
pip install poetrycommand is added to install Poetry within the Docker image. - The
WORKDIRinstruction sets the working directory to/app, where the code will be copied. - The
COPY ./pyproject.toml .command copies thepyproject.tomlfile from the host machine’s current directory (where the Docker build is being executed) into the/appdirectory inside the Docker image. - The
RUN poetry config virtualenvs.create falsecommand disables the creation of a virtual environment by Poetry, as we want to use the Python environment within the Docker image. - The
RUN poetry install --no-root --no-devcommand installs installs the project dependencies defined inpyproject.tomlwithout installing the project itself (--no-root) and skips the development dependencies (--without dev). - The
ENV PYTHONPATH=${PYTHONPATH}:${PWD}} line ensures that the current working directory (PWD,/appin our case) is added to thePYTHONPATH, along with any existing paths specified in${PYTHONPATH}. In case additional modules and packages will be located in the current working directory, this will allow Python to search for them there when executing scripts or importing modules. - The
COPY ./app/ingest_data.py .command ccopies theingest_data.pyscript from the host machine’s current directory (where the Docker build is being executed) and places it in the/appdirectory inside the Docker image. - The
ENTRYPOINTinstruction is updated to use Poetry to run the Python script and ensure that the script runs within the Poetry environment, with all the dependencies properly resolved.
The Database Side
We are almost ready to move to defining the docker-compose.yml file. But before that, we have one last step: handling environment variables for the PostgreSQL database service to set up the database. We need to safely pass configuration details (“secrets”) such as the database name, username, password, and any other required settings for the database setup to Docker:
POSTGRES_USER=root
POSTGRES_PASSWORD=root
POSTGRES_DB=machines_db
For the database side, I will demonstrate how Docker Compose can help mitigate the risk of exposing sensitive information by using secrets. To incorporate the three secrets above into a container, I add postgres_user.txt, postgres_password.txt, and postgres_db.txt files to the /config subdirectory of the project. Each file contains the corresponding secret value.
Docker Compose
With the database configuration files also in place, we can now proceed to define the docker-compose.yml file:
services:
  database:
    image: postgres:13
    environment:
      - POSTGRES_USER_FILE=/run/secrets/postgres_user
      - POSTGRES_PASSWORD_FILE=/run/secrets/postgres_password
      - POSTGRES_DB_FILE=/run/secrets/postgres_db
    secrets:
      - postgres_user
      - postgres_password
      - postgres_db
    volumes:
      - ./database/data:/var/lib/postgresql/data:rw
    ports:
      - '5431:5432'
  app:
    build:
      context: .
      dockerfile: ./app/Dockerfile
    volumes:
      - ./config/python_connection.env:/app/python_connection.env
    depends_on:
      - database
secrets:
  postgres_user:
    file: ./config/postgres_user.txt
  postgres_password:
    file: ./config/postgres_password.txt
  postgres_db:
    file: ./config/postgres_db.txt
Database service
In this configuration of the database service:
- It is defined with the image directive set to
postgres:13, pulling the official Postgres Docker image version 13. - The service definition references the required secrets using the
environmentandsecretsattributes.- The deployment of the Postgres container will result in Docker creating a temporary filesystem mount under
/run/secrets/<secret_name>with their specific values. - The secrets attribute under the Postgres service defines the secrets I want to inject into the corresponding container.
- The deployment of the Postgres container will result in Docker creating a temporary filesystem mount under
- The
- ./database/data:/var/lib/postgresql/data:rwinstruction of the volumes section maps the./database/datasubdirectory on the host machine to the/var/lib/postgresql/datadirectory inside the container. This ensures that the data generated by the database service is persisted in the./database/datafolder on the host. - Ports are mapped from the container’s port 5432 to the host machine’s port 5431 for accessing the database.
App service
For the ingest_data.py script:
- The app service is assumed to have its Dockerfile located in the
./appsubdirectory and is built accordingly. - The
./config/python_connection.env:/app/python_connection.envinstruction ensures that thepython_connection.envfile is available for the script within the container at the/appsubdirectory, the way I have defined in the updated version of theingest_data.pyscript. - The
depends_oninstruction in a Docker Compose file ensures that the specified service, in this casedatabase, starts before the dependent service,app.
Secrets
The top-level secrets section defines the variables postgres_user, postgres_password, and postgres_db and mounts the files that populates their values.
NOTE: Using a volume mapping for the python_connection.env file is a way to provide the necessary sensitive information to the app script without directly exposing it: at the host, this configuration file is stored locally in the /config directory outside of the Docker image and is not accessable via docker inspect command.
Supporting the Dependent Service
The depends_on instruction does not guarantee full readiness or availability of the dependent service, rather that the dependency service starts first. Additional mechanism is required within the app script to ensure that the dependent service can successfully connect and interact with the dependency, such as implementing health checks and connection retries in the application code. To this end, I add the check_database_health function to the ingest_data.py file, and then use it within the main function:
def check_database_health(db_url):
    try:
        # Create an engine using the database URL
        engine = create_engine(db_url)

        # Try to connect to the database
        with engine.connect():
            return True  # Database connection successful

    except OperationalError:
        return False  # Database connection failed
Instead performing the database operations directly, I add connection retries to the main function:
database_url = f'postgresql://{user}:{password}@{host}:{port}/{db}'

# Wait for the database to become available
while not check_database_health(database_url):
    print("Waiting for the database to become available...")
    sleep(10)  # Wait for 10 second before retrying

engine = create_engine(database_url)
Finally, we can run the docker-compose up command! This command will build the necessary images, create the containers, and configure the network and volumes according to the specified configuration in the compose.yml file. Then it will start the container, which will include two service containers, one for the database and one for the app service, and bring up the entire data pipeline.
Now, in the Python console we can approach the database from the host and see, that the Postgres container is up and the data has been ingested:
>>> import pandas as pd
>>> from sqlalchemy import create_engine
>>> engine = create_engine(f'postgresql://root:root@:5431/machines_db')
>>> pd.read_sql("""SELECT * FROM accelerometer_raw LIMIT 1 OFFSET 153000-1""", con=engine)
   wconfid  pctid      x      y      z
0        3    100  1.199 -0.176  0.109
Summary
In the first part of our exploration, I introduced Docker by discussing its core concepts such as running containers from pre-built images. Next, we delved into the topic of container orchestration using Dockerfiles, which enable us to define container configurations, manage dependencies, and set up environments. I created Dockerfiles for Python and Postgres containers, including dockerizing a data ingestion script, and established communication between them using networks to manage them as one cohesive system. Finally, I tied it all together with a hands-on data engineering project - implementation of a containerized data ingestion project through a Docker Compose script. Throughout this tutorial, I covered essential aspects of the Docker workflow, including basic commands, porting, volume mounting, handling environmental variables, and maintaining an organized directory structure for a project to enhance clarity.
NOTE: The full repository of this tutorial is available here.
Further Steps
Particular measures can be implemented further down the road, aiming to enhance the reliability, efficiency, and overall management of data pipelines in general. These measures vary depending on the business value context and requirements of the data pipelines behind: some of them are relevant for the simple pipeline we have implemented, some are used in more sophisticated use cases. They can be grouped into several topics:
- Testing and data validation - goes without saying. 😂
- Observability and troubleshooting.
- Performance and optimization.
- Data governance.
- Security.
1 See more on containerization here.
2 See how to install Docker for different operating systems from this chapter of the Docker Turotial by Nana Janashia.
3 Although reading parameters from environment variables is intended to prevent their exposure, this method still carries a certain level of risk in terms of unintentional vulnerability. Docker Compose provides a way to read the parameters without having to use environment variables to store information. I consider this approach in the Database Side section.
4 I use poetry to manage the dependencies, for more details see my Data Scientist Joining CI/CD party, Part 1 blog post.
5 Here, instead of using command-line arguments, we store the environmental variables in an .env file and make them available to the script.