This blog post is the first in a series discussing the closely related notions of version control, dependency management, and continuous integration/continuous deployment practices. In this series, I continue to draw on the benefits of introducing good software development practices in the data scientists’ workflow. In the first part, I walk the reader through the basics of collaborative work, including version control and dependency management.
Introduction
As a data scientist, I relish the research phase of a project - exploring the data, improving its quality, and building models, but the code that powers these models is just as important. Asumming that any code-based company aims to use its resources efficiently and, thus, prioritizes high coding standards, your model will never make it to production, until it is written appropriately. You could argue that this is the essence of teamwork - everyone has their role to play. My job is to prototype quickly and efficiently, ensuring that my code works properly. From there, it’s up to the developers to take my work and make it production-ready. Sure, everyone has their part to play, but it all needs to fit together seamlessly. Not to mention, you can find yourself playing multiple roles - a data scientist, a data engineer, a software developer, and a DevOps engineer all in one.
Since everyone’s goal is to deploy code as quickly as possible, delivering properly written (and documented!) code not only supports developers in their work, but literally makes everyone happier. Yes, data science is about discovery and experimentation. However, in the industry, very few companies can afford to give data scientists complete free rein. Doing your best by following good software engineering practices has become crucial to create real value for your organization.
What Do Good Software Engineering Practices Mean to You?
Before we proceed, I need to level with you: at the moment this post was written, I wasn’t exactly a software engineer - and I may not be the one by the time you read this, either. However, through my own experience and working with skilled software engineers, I’ve learned firsthand the critical role that good coding practices play, both in general and especially when it comes to deploying models in production. Below is a list of a few tricks I’ve picked up along the way. I’ve already written about some of these practices in my other posts (links attached). In the current series, I will talk in more detail about the last three ones.
The following are the easy-to-follow good practices I follow, although not always in a linear manner:
- Divide the components into modules (then connect and run them within a concise script).
- Use classes and inheritance.
- Re-use the existing codebase.
- Write unit tests (as part of the documentation also).
- Run these tests.
- Refactor.
- Parameterize (and introduce a programatic way to specify the parameters).
- Create a repository (a project within a repository) and use version control.
- Explicitely indicate dependencies your code needs.
- Use feature branches and protect matching branches.
What are the benefits?
The short answer is: you make your team stronger and your software better. The longer version tells your code becomes ready to be integrated as part of the software for use by end-users. What does that mean? Your code does whatever you planned it should do, is free of bugs and robust. It becomes easier to follow, update, and maintain. It does not cause issues in other parts of the codebase and can be integrated with any necessary systems or frameworks.
This level of readiness is necessary to ensure that the code can be deployed and used in a real-world production setting without causing errors that could disrupt operations or negatively impact users. The practices above force you into good behavior: think the things over and make architectural decisions before you start coding and make sure the code is well-written and well-documented. In what follows, I walk through the process of creating a repository and setting up version control and dependency management. However, the ultimate goal is to show how a Continuous Integration and Continuous Deployment (aka CI/CD) pipeline can be set up and managed to reap the benifits of automated checks applied to your changes on feature branches before merging them into the main branch, even when you’re the sole contributor to the repository. This topic will be covered in Part 2 of this series.
Leveraging GitHub Repositories to Build Good Habits
While transitioning into data science, I became accustomed to working on my codebase alone, and when being in the research mode, I often worked on different schedules than developers usually do. Adjusting my workflows to fit into a regular CI/CD process at a SaaS company reminded me of my first week of learning Hebrew - practicing just writing those odd letters several hours a day was frustrating, but you get excited after a few days when those shapes start looking familiar and you can read basic words. So, let’s start with the basics, code repositories and version control systems.
A popular platform for hosting code repositories is GitHub. At the heart of GitHub is an open-source version control system (VCS) called Git. Git is a gate to GitHub-related actions on your computer. It can be downloaded and used on the command line or using a GUI/IDE. If you are not interested in working with files locally, GitHub lets you complete many Git-related actions directly in the Web browser, including creating a repository. Jumping ahead of myself, GitHub provides some CI/CD features, such as Actions and Packages, which will make a good service for our purposes, despite not being as extensive as those of other dedicated CI/CD platforms typically used by large enterprises or organizations with complex software development needs and extensive infrastructure requirements.
Creating a Repository
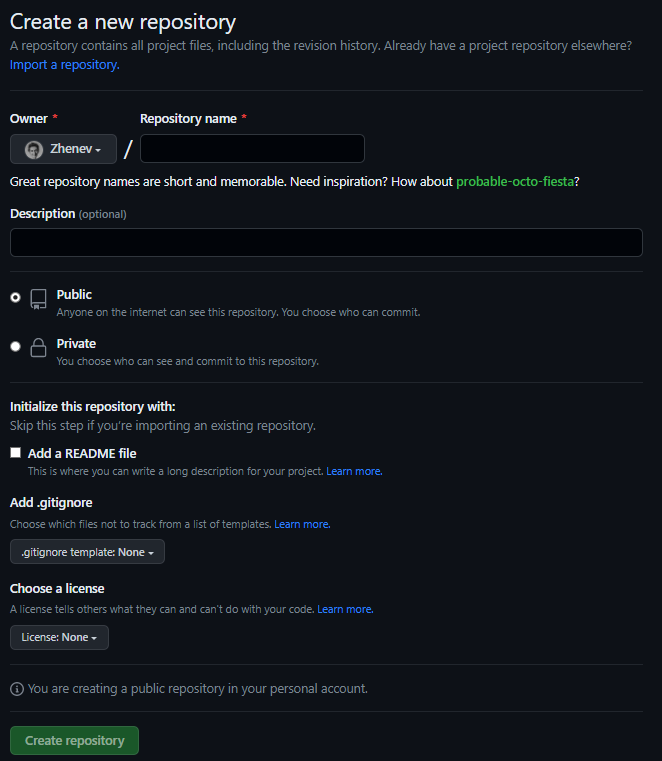
Let’s see how to create a repository in the Web browser. When you are signed in, there is a plus sign with a drop-down menu in the upper-right corner of any page, where you can select the New repository option. Alternatively, you can use the green button named New in the repository tab of your profile:

I choose the name, mark Add a README file field (optional), select license (optional), and push Create repository.
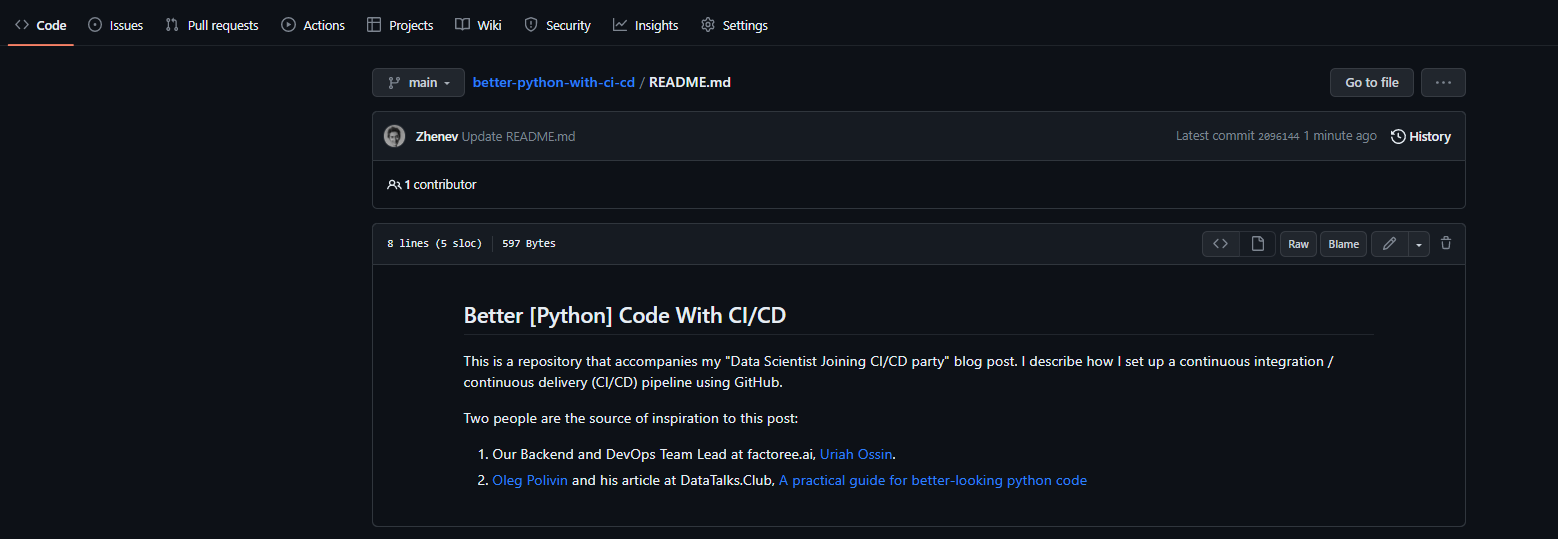
The README file is automatically shown on the front page of the repository, so the repository can be described it in more details:
Setting Up the Scene for Version Control and Dependency Management
While I am not a version control expert, I do want to take a moment to reflect on the obvious advantages it offers before we proceed with the setup. Firstly, it’s like having a responsible parent who gives you the freedom to try new things while ensuring you’re always safe. Similarly, with version control, you can experiment with new ideas without worrying about messing up the entire codebase, since there is always an option to step back. Secondly, it’s like a great kindergarten where everyone gets to share toys ideas in a safe and collaborative environment. With version control, team members easily share code, and track each other’s progress without any fear of losing their work.
One of the crucial tasks in Python projects, as they heavily rely on external packages and libraries to function properly, is managing dependencies. Effective dependency management for real-world applications requires more than simply listing the required packages in a configuration file, such as requirements.txt in Python. Without specifying the exact versions of each package, conflicts or unexpected behaviors may arise when different versions of the same package are used by different dependencies of the project. poetry is a popular tool that simplifies the process of managing and installing Python packages by explicitly specifying dependencies, including minimal versions, in a pyproject.toml file. This allows creating a virtual environment with the necessary packages for the project, while a poetry.lock file is generated that contains the exact versions of each package used.
To demonstrate how it works, I created a project folder within the repository. The topic of the project is inspired by Joel Grus’s work on drawing attention of data scientists to different aspects of coding, testing, software design, and math in Python. As a tribute, the project folder is named ‘fizz_buzz’. If you haven’t already, check out Joel Grus’s ultimate (and very purposeful) collection of ‘fizz_buzz’ examples.
Comment 1: Just as a side note, here we are touching on another useful concept, monolithic repositories (“monorepos”), which I found fascinating when first got the opportunity to work with them. Monorepos are out of the scope of this series, but in short, they allow multiple projects to be stored and managed within a single repository, providing a better user experience, which we are aiming for at the moment, such as easier code sharing, centralized version control, and simplified dependency management. In this video, Dave Farley explains the Continuous Delivery perspective of the topic and related software architecture trade-offs.
Comment 2: As a good habit, we also create a test folder within the project from the very beginning.
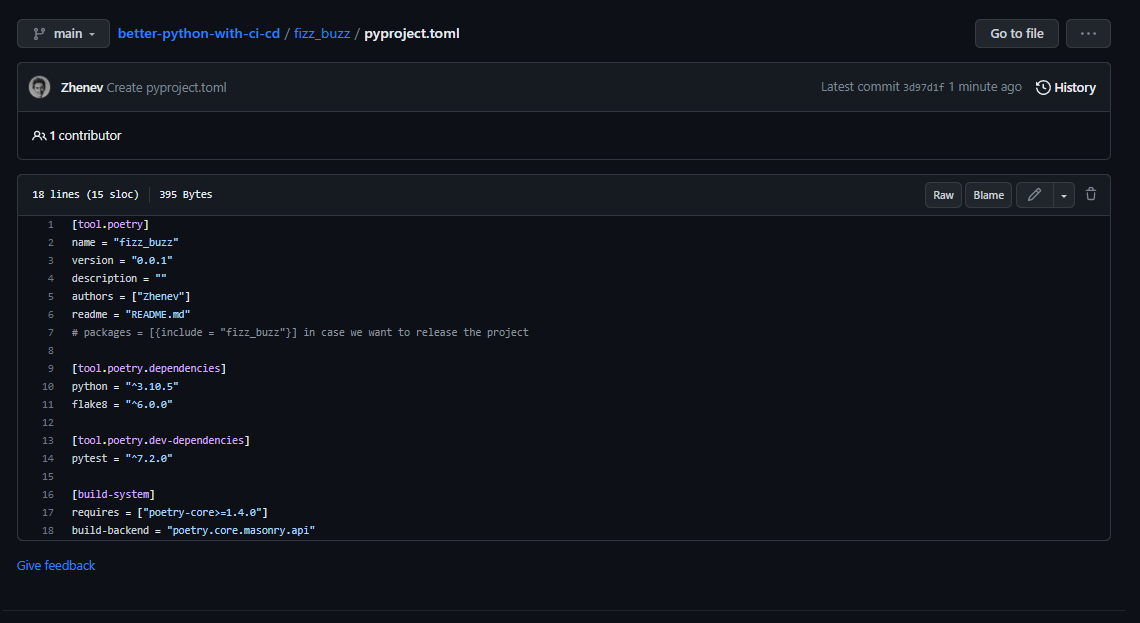
The basic structure of pyproject.toml file includes:
[tool.poetry]section: this section is used to specify metadata about the project such as name, version, author, description, and license.[tool.poetry.dependencies]section: this section is used to specify the project’s dependencies, including the package name and version constraints.[tool.poetry.dev-dependencies]section: this section is used to specify the project’s development dependencies, such as testing frameworks or linters.[build-system]section: this section is used to specify the system requirements and configuration to package the code and any necessary dependencies into a distributable format; includies the build backend, which can be set topoetry.masonry.api.
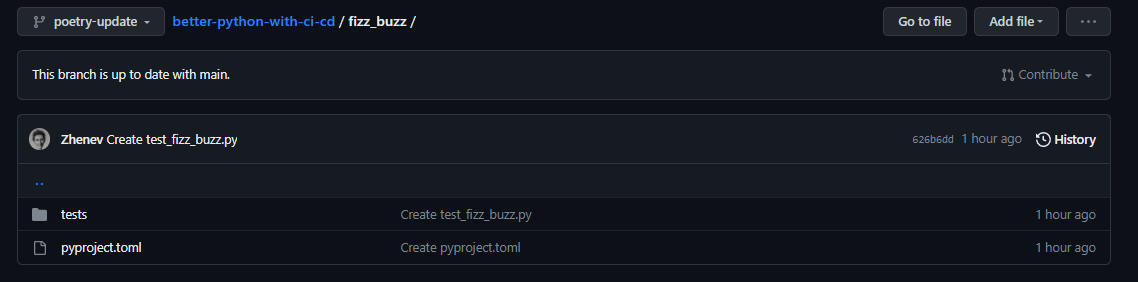
This is how out project folder looks at the moment:
Now, I am ready to run the fuzz_buzz project locally.
First, I clone the repository:
git clone https://github.com/Zhenev/better-python-with-ci-cd
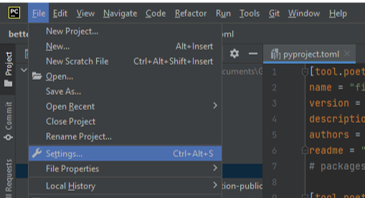
Then, I need to set up the interpreter. In what follows, I walk through this process as it can be done using PyCharm:
- Open the
Settingsmenu:
- Look for the
Python Interpretermenu:
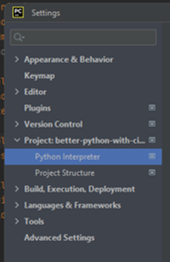
- Open the drop-down menu…

- …and choose the
Show alloption to open thePython Interpreterswindow:

- Choose the
+sign in the top-left corner of thePython Interpreterswindow to add new interpreter:
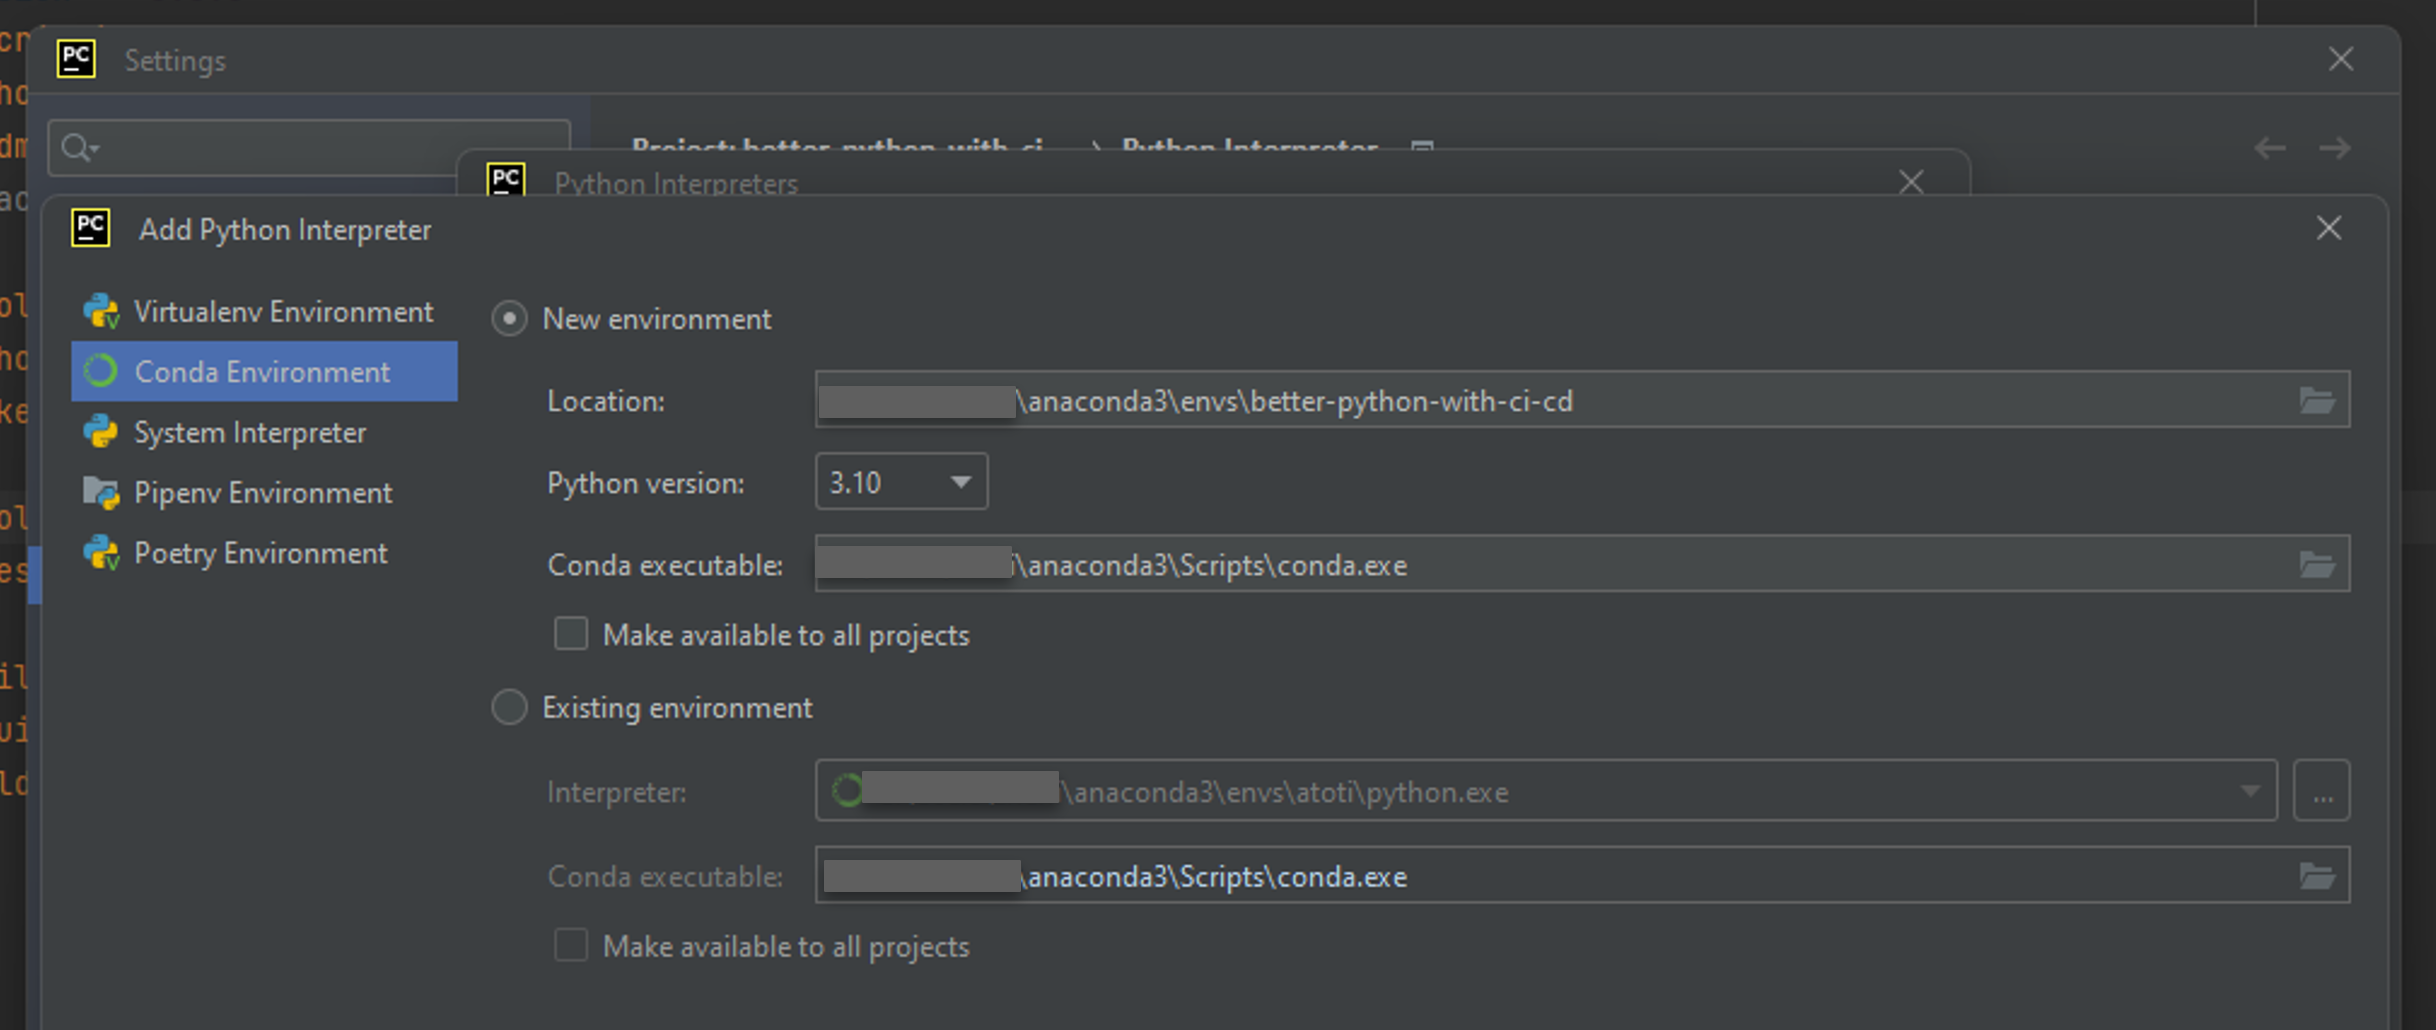
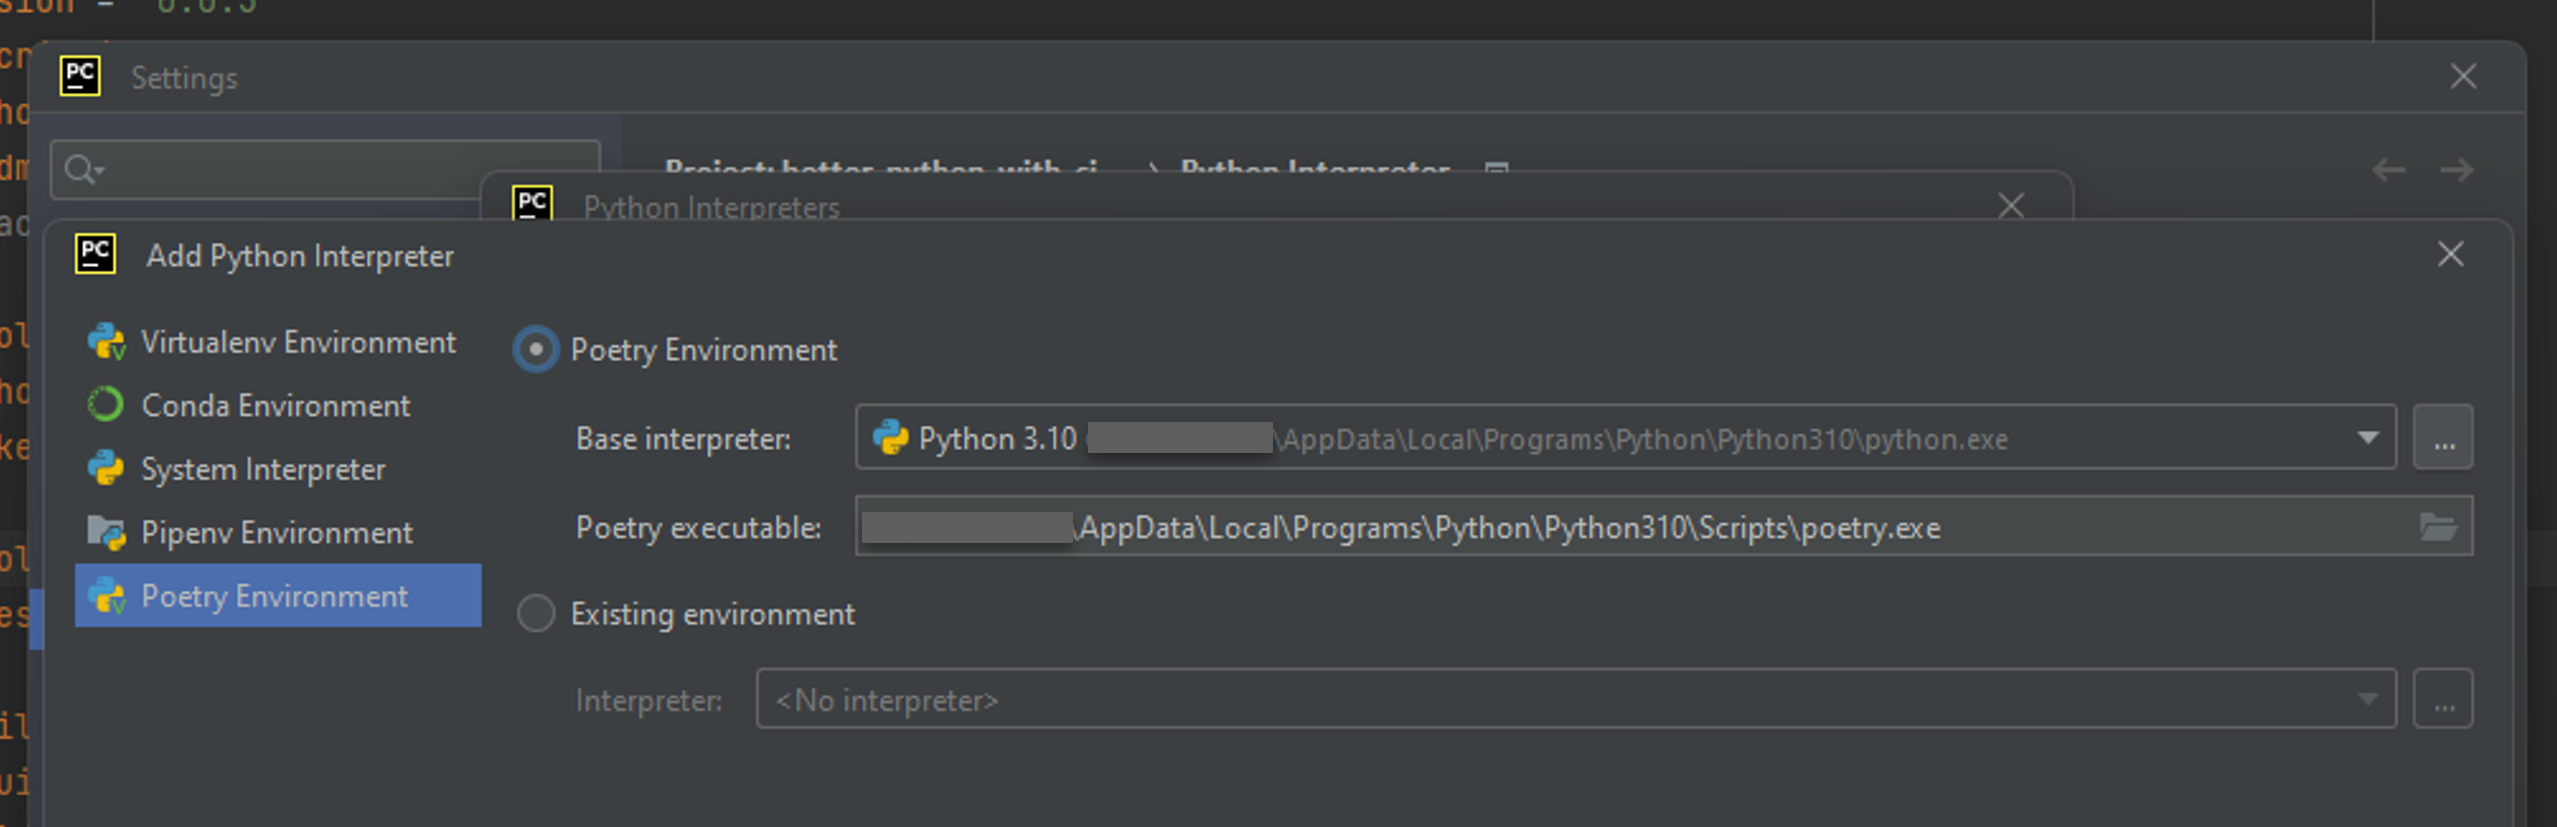
- In the
Add Python Interpreterwindow, choose thePoetry Environmentoption:

- You can change the base interpreter:
- When you push
OK, the environment starts to be set up:

- When the set up is finalized, the name of the new environment appears in the
Python Interpreterslist, choose it and confirm:
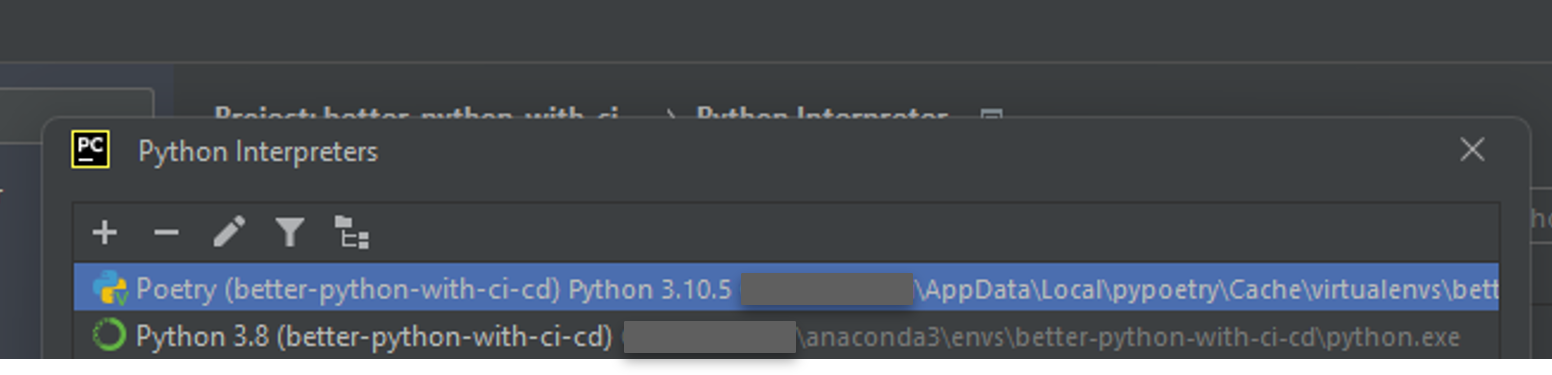
- Track which environment you are working in at the moment (in Pycharm, its name is displayed in bottom-right corner)

Finally, we can apply the dependencies listed in the pyproject.toml file. To this end, we move into the project folder…
cd .\fizz_buzz\
…where we run the poetry update command:

When being run for the first time, a new poetry.lock file is created within the same folder.
NOTE: For each new project (folder) added to the repository, it is recommended to include a separate pyproject.toml file within the project folder. Opening the project folder as a separate project in a new IDE window allows proper isolation and management of dependencies for each project. In this case, the pyproject.toml file serves as the configuration for the project’s dependencies using Poetry. Thus, PyCharm will automatically detect the presence of the pyproject.toml file and suggest creating a Poetry environment based on its contents. By accepting this suggestion, PyCharm will set up the project with the appropriate Poetry-based interpreter environment, allowing seamless integration with the specified dependencies.
Conclusion
In this blog post, I discuss the benefits of introducing good software development practices in the data scientists’ workflow. In brief, joining the movement can be daunting, but it can make the data scientist’s professional life much easier and the whole team happier, ultimately contributing to the success of their project and creating value. I list a few easy-to-follow practices that I picked up along the way, some of which are discussed in my other posts. This post is the first in a series discussing the closely related notions of version control, dependency management, and continuous integration/continuous deployment practices, and it introduces the basics of collaborative work, including version control and dependency management.